
Your work, services, socials and contact details. All on one page you can add to your bio.
Pick a design you like, give AI your details and make it yours. Here are the prompts and every step from the first screenshot to a public link.
Get the promptUse an AI chat that can read images and write code. You’ll need a computer for the manual upload option below.
1. Pick a design
Open Linktree’s templates, choose one you like and take a screenshot. Try to capture the full page: background, photo, text and buttons.
You don’t need to buy the template or build a page in Linktree. You’re using the screenshot as a visual reference for AI.
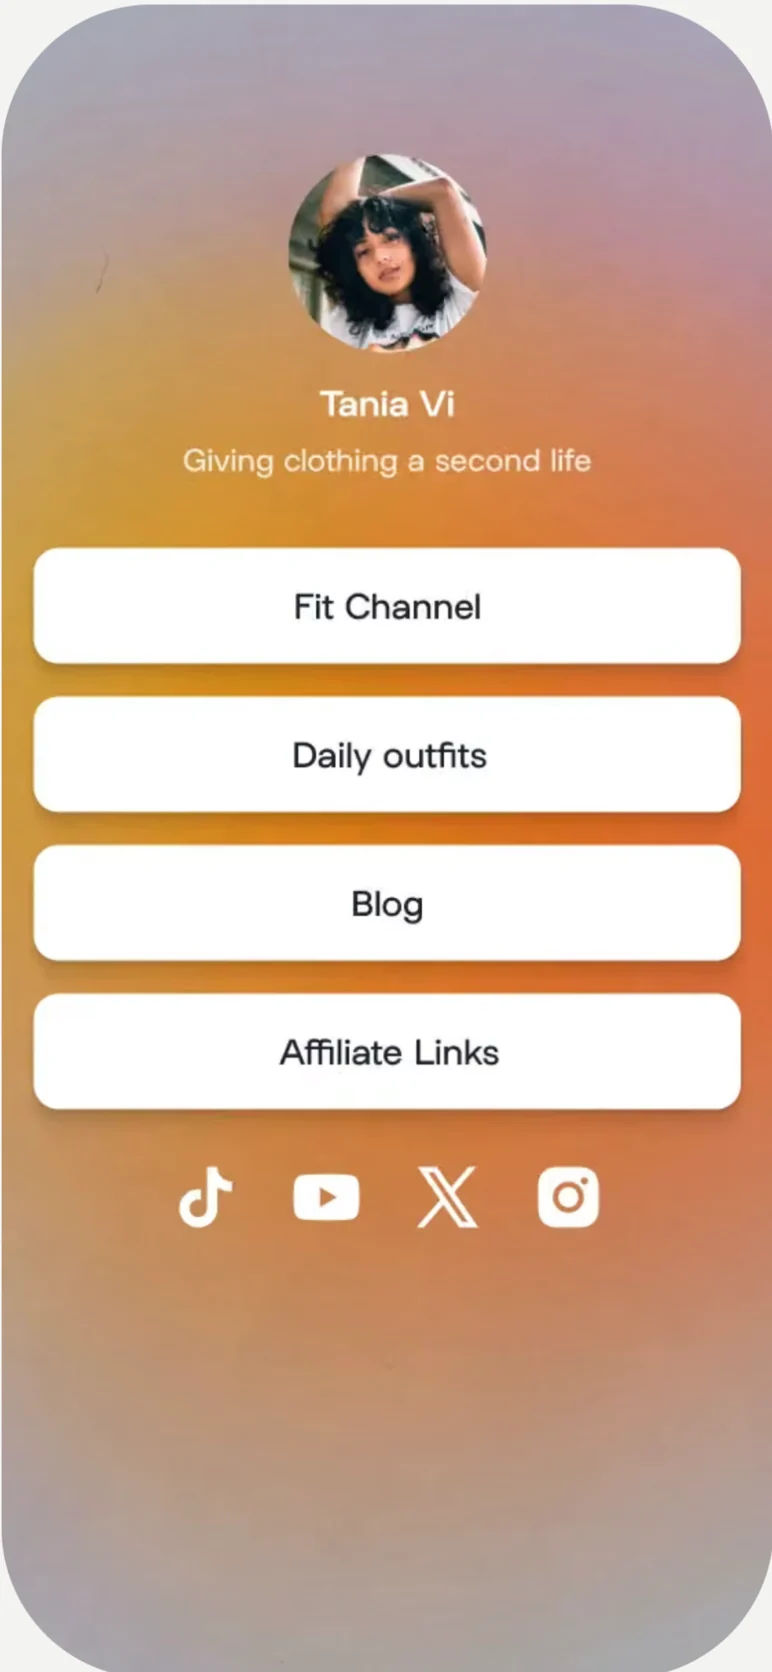
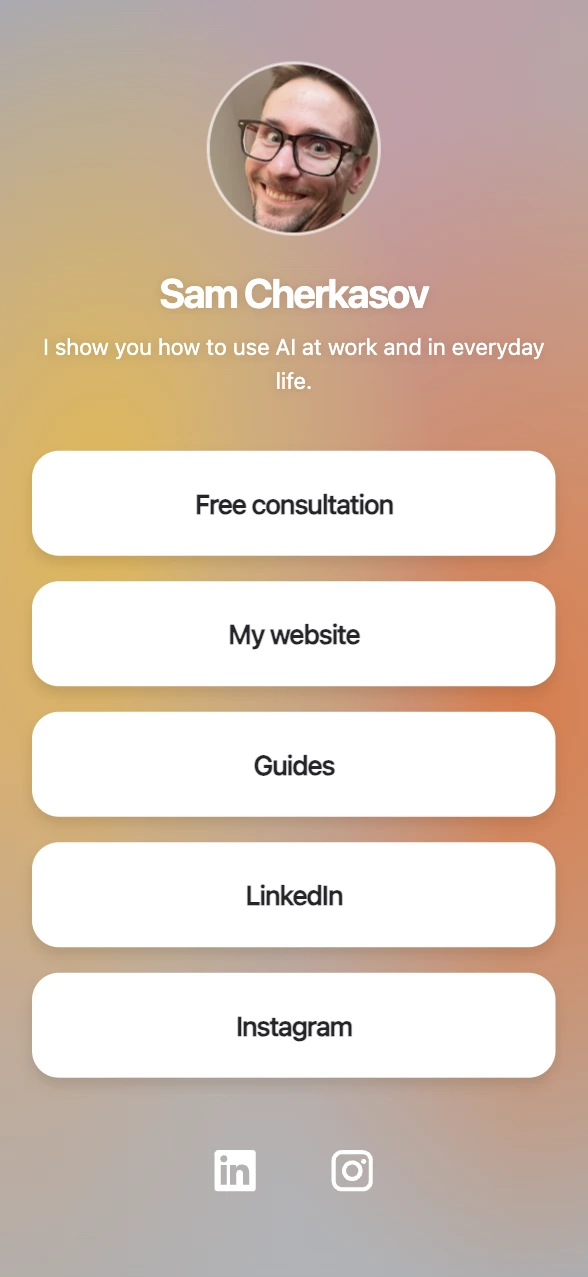
Tap either image for a closer look.
2. Add the screenshot and prompt
Start a new AI chat and attach your screenshot. Copy the prompt below, replace everything in square brackets with your own details and send it with the screenshot.
Add the full address for each button. For example: “My work” with your portfolio link, or “Book a call” with your booking link.
Create a personal link page using the attached screenshot as a visual reference for the layout, background, colours and buttons. Replace the example’s name, photo, text and links with my information below.

Name: [your name]
Bio: [1–2 short sentences about you]
Buttons:
[button label]: [full link starting with https://]
[button label]: [full link starting with https://]
[button label]: [full link starting with https://]
Social links: [platform names and full links]
Photo: [use my attached photo / no photo]
Page language: English.

Build a real, mobile-friendly webpage with working links, not an image. It should also look good on a computer. Make the text readable and the buttons easy to tap.

Use only the information and exact links I provide. Don’t invent testimonials, achievements or services. If a link is missing, leave that button out. Don’t add the Linktree logo. If there’s no photo, make a clean version without one.

Give me a ready-to-use index.html with the styling included. No installation, build commands, extra libraries or paid components. If possible, embed the photo in the HTML. If images need separate files, include them alongside index.html and provide a ZIP. If you can only return code, give me the complete HTML and explain how to save it as index.html. I’m not a programmer.

If you can, show me a preview. Create the page first and let me review it before publishing.
Your best selfie is optional. 😉
Want a photo on the page? Attach it to the same message. Otherwise, put “no photo” in the prompt.
3. Check the result
If your chat offers a preview, open it. If it gives you an index.html file, download it and double-click it on your computer. If you get a ZIP, unzip it first.
Check your name, bio, photo and every button. Make the browser window narrower to see whether the text and buttons still fit. You’ll check it on your phone after publishing, too.
Want a different background or bigger buttons? Ask for that specific change in the same chat. You can attach a screenshot and point to the part you want changed.
I want to change one thing on this page: [what to change].
What I see now: [what you see or what isn’t working].
What I want: [the result you want].

Keep the rest of the design and my links as they are. Give me an updated index.html and include any other files it needs.
Got an image instead of a working page? Say: “I need an HTML file with clickable buttons that open my links. Please build the webpage, not a picture of it.”
4. Publish it and get a link
Send this in the same chat:
Help me publish this page for free and get a public link.

Suggest the simplest option without coding and walk me through it step by step.

If you can complete any of the steps yourself, do them. Clearly explain what I need to do.

Once it’s published, provide the public URL and help me check that the page and its links work on a phone, without needing to log in.
If your AI can publish websites, follow its steps. You may need to sign in to a hosting service. The final link should open the page itself in a browser, without asking people to log in to your AI chat.
If your AI can’t publish it
For the finished HTML page, use Netlify Drop. You upload a folder from your computer.
- Put the files in one folder. Call it something like
my-links. Opening that folder should immediately showindex.html. Include any separate photo files with the names your AI used. Unzip a downloaded ZIP first. - Sign in to Netlify. Use an existing account or create one on the Free plan. Then open Netlify Drop.
- Drag the folder into the upload area. Wait for the upload to finish. With this ready-made HTML page, you don’t need to edit code or run any commands.
- Make the page public. If the project is marked Private, use the visibility or Publish option to make it public. Copy your page’s address ending in
.netlify.app.
Not sure which files to upload?
Send this to your AI:
Prepare this page for Netlify Drop. I need a folder with index.html directly inside it, along with any images it needs. No build step or terminal commands.

Give me a ZIP containing the finished files. If you can’t create a ZIP, provide the files separately and explain in plain language how to put them in one folder.
When you open the folder you’re uploading, index.html should be right there. If you see another folder first, upload that inner folder instead.
Netlify’s Free plan has usage limits. You don’t need to buy a custom domain. Your AI chat’s features and limits depend on its service and plan. See Netlify’s current plans.
5. Open it on your phone
- Open the public link in a private browser tab on your phone. It should work without logging in.
- Check that your photo loads, the text is readable and the buttons fit on screen.
- Tap every button and check it takes you to the right place.
Everything works? Add the link to your Instagram bio, LinkedIn profile or wherever you want to share it. Done!
Want to change something later?
Go back to the same AI chat, ask for the change and download the updated files. In Netlify, open the same project → Deploys and drop the updated folder into the manual upload area. That keeps your page at the same address.
Getting a 404 or a missing photo?
For a 404, check that the file is named exactly index.html and sits directly inside the uploaded folder. If the photo is missing, check that you uploaded it with the page. You can also send your AI a screenshot of the problem and ask for a corrected folder for Netlify Drop.
The manual publishing steps were checked against Netlify’s official instructions on 22 October 2026. Button names may change.